News
Learn how Unblink3D solutions enables Zero Defect Manufacturing
Intro
In the world of modern 3D metrology, coordinate measuring machine (CMM) is a key investment for manufacturers to obtain 3D dimensional data in modeling and analytical applications. The vital needs to validate the dimensional and geometric accuracy and precision against GD&T profiles in the manufacturing and automotive industries cannot be understated. This is especially true as products are becoming increasingly complex and with a more litigious environment against defects, recalls and reputation damage, automated inspection quality control solution must keep up and evolve with the changing environment.
The adoption of CMMs is expected to grow in the foreseeable future with quality, accuracy and precision to be the topmost requirements for its end users. Inspection is crucial to certify the quality of parts and products, and also to guarantee a manufacturer’s compliance with industry standards. However, today’s inspection method that relies on CMM only measures limited samples of part’s geometry, and sampling is no longer sufficient to prevent downstream defects. Therefore, to achieve zero defect manufacturing, measurement and quality assurance must move away from the traditional measurement room, and to the production areas in order to achieve 100% inline inspection – where manufacturing conditions are continuously changing and hidden process errors could occur.
3D Vision Automated Inspection Quality Control is the Answer
To meet the stringent quality, accuracy and precision requirements in their respective industries, many manufacturers – particularly those from the automotive and healthcare – have adopted 3D metrology inspection solution from for every step of their manufacturing process.
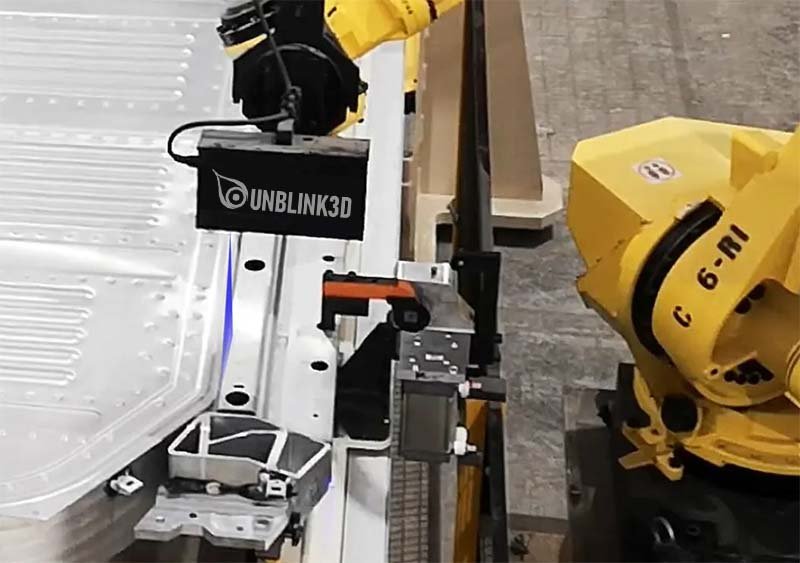
Through the utilization of high resolution 3D scanners, combined with the processing power of Unblink3D ScanXtream software, the 3D automated inspection solution offers a high degree of detailed and easy-to-interpret quality and dimensional information – free from the risk of manual user error. When compared to the numerical output from a CMM, automated 3D vision inspection solution presents quality data in an easy to understand format such as real-time CAD visualization in color coded deviation from specifications.
Quality Data Should Not Exist in Isolation
A typical CMM allows probe movement along three axes that are orthogonal to each other in a 3D coordinate system. Traditionally, the dimensional data obtained from the CMM exist only in isolation and is backward looking – it does not provide real-time insight of the production process. Through the deployment of 100% inline automated 3D vision inspection solution, real time quality data of all parts generated from the inspection will be stored and analyzed by Unblink3D SPCWorks for predictive defect prevention. This allows potentially problematic areas to be intelligently and accurately identified to aid in rework and corrective actions. Armed with the ability to quickly detect component dimensional errors and surface defects, parts with bulges, dents, scratches or weld spatters could be avoided.
In addition to predictive defect prevention, the scanning and measurement performed in real-time at the production line will also ensure there will be minimal disruption to the production output, and guarantees problem-free final assembly – thereby enabling, with a high degree of confidence, the production of high-quality products via full traceability of all inspection data.
End users from various industry backgrounds consume our data differently to achieve their objectives. To illustrate the wide-ranging applicability of the automated 3D vision inspection and predictive defect prevention solutions, here are some examples of how the solution might be of assistance to different use cases. A plant manager might need plant-level reporting on downtime and total number of rejects. On the other hand, a line supervisor might want to look for model level rejects for line stoppage and overall model quality numbers. From the perspective of an operator, equipped with the knowledge observed from the automated inspection station could help assist them to make a quick decision on a rejected part – whether to contain and route to repair or continue build. Lastly, a QA/QC might utilize the data of the overall metrics on build quality, and proactively improve the process through the use of root cause analysis tools for continuous improvements.
Take Quality Control to the Next Level
In today’s modern production environment, 3D vision automated inspection workflow enables manufacturers to identify, analyze and fix issues in the manufacturing process before it leads to a downstream defect by harnessing the power of the digital twin. One should realize that it is no longer just a question of improving product quality, rather, it is to improve the entire production process. Unblink3D software solutions will better equip and prepare for success through preparation rather than reacting to problems as they emerge. Nothing is left to chance.


